Setting Up pfSense: A Step-by-Step Guide
Security and Pentest Home Lab Environment
🧱 Part 2 – pfSense Setup & Configuration
In this module, we’ll install and configure pfSense, the open-source firewall that segments and secures your home lab network.
Go to the official download page:
pfSense CE Download
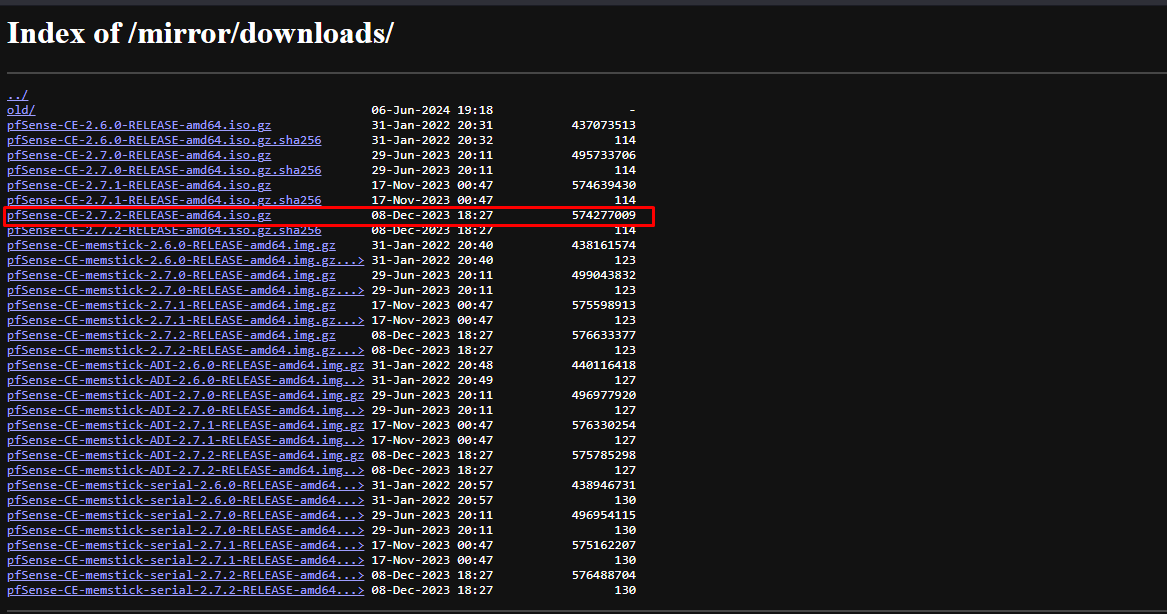
The downloaded file will have the extension .iso.gz. Use a tool like 7-Zip to extract the .iso image.
🖥️ Create pfSense VM
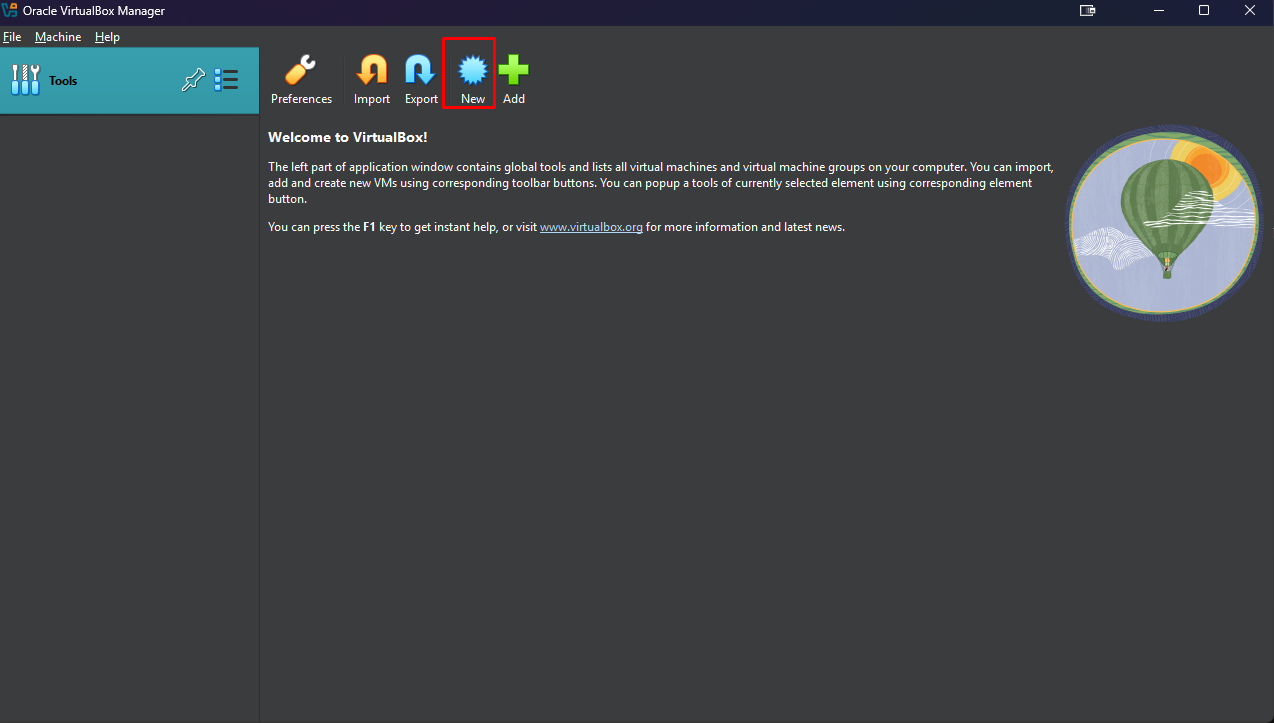
- Open VirtualBox → Click
Tools→New - Set:
- Name:
pfSense - Type:
BSD - Version:
FreeBSD (64-bit) - Choose the extracted
.isoas the ISO image
- Name:
- Click
Next
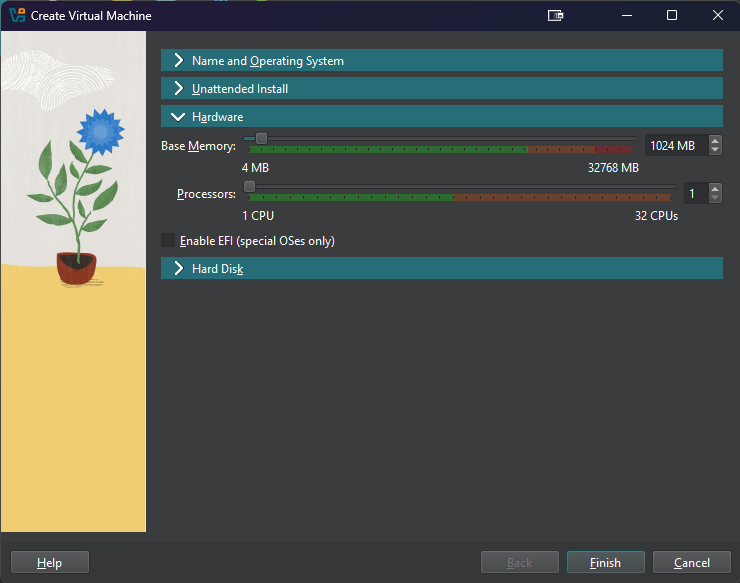
- Accept the default memory/CPU settings → Click
Next
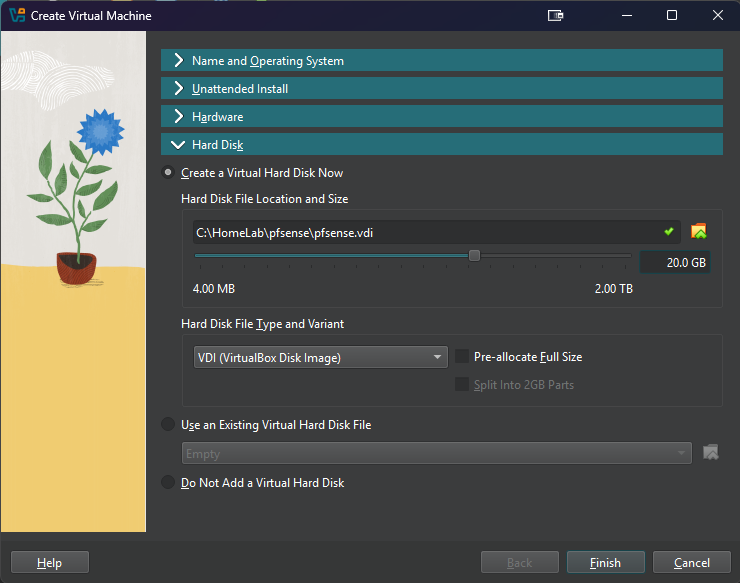
- Set disk size to
20GB→ ClickNext
- Review → Click
Finish
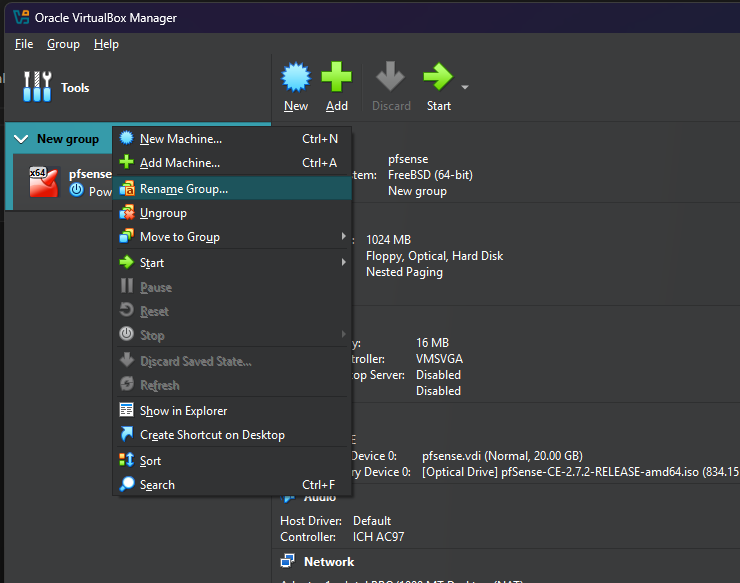
🗂️ Organize VM into Group
- Right-click pfSense VM →
Move to Group→[New] - Right-click
New Group→ Rename toFirewall
⚙️ Configure pfSense VM Settings
Select pfSense VM → Click Settings
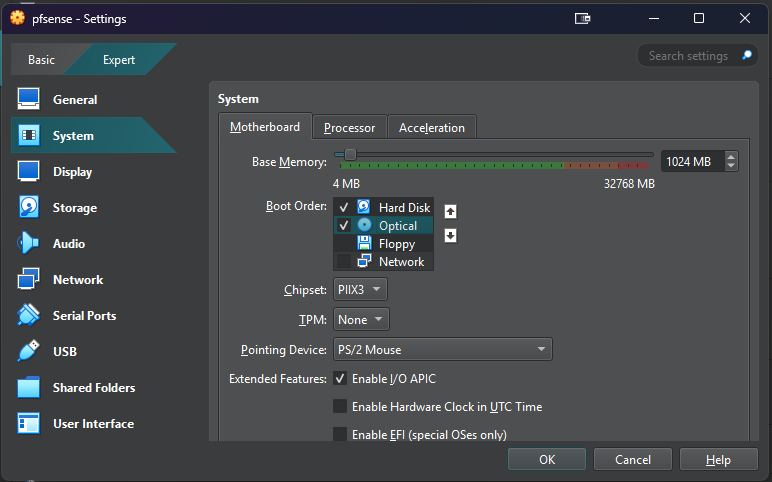
🧠 System
System → Motherboard- Boot Order:
Hard Disk, thenOptical - Uncheck
Floppy
- Boot Order:
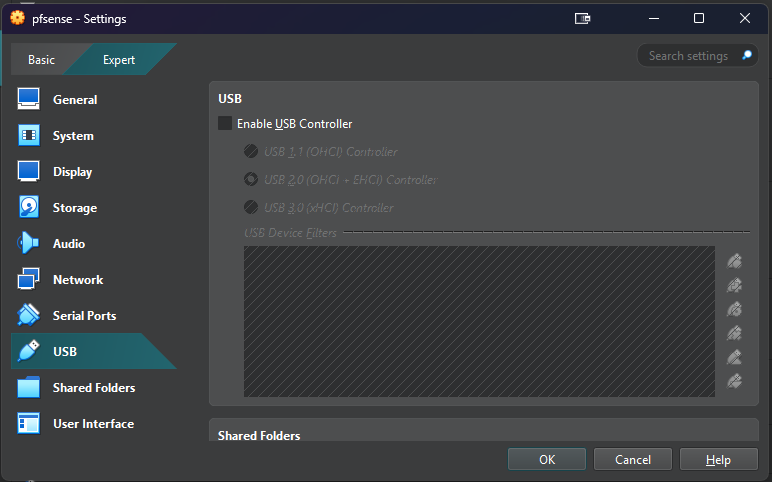
🔇 Disable Unused Hardware
Audio: UncheckEnable AudioUSB: UncheckEnable USB Controller
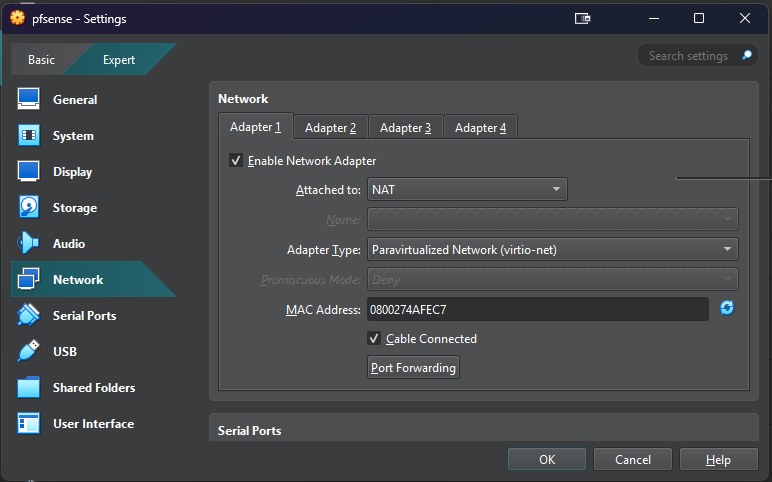
🌐 Network Adapters
Configure 4 adapters:
- Adapter 1 (NAT):
- Attached to:
NAT - Type:
Paravirtualized Network (virtio-net)
- Attached to:
- Adapter 2 (LAN 0):
- Attached to:
Internal Network - Name:
LAN 0
- Attached to:
- Adapter 3 (LAN 1):
- Attached to:
Internal Network - Name:
LAN 1
- Attached to:
- Adapter 4 (LAN 2):
- Attached to:
Internal Network - Name:
LAN 2
- Attached to:
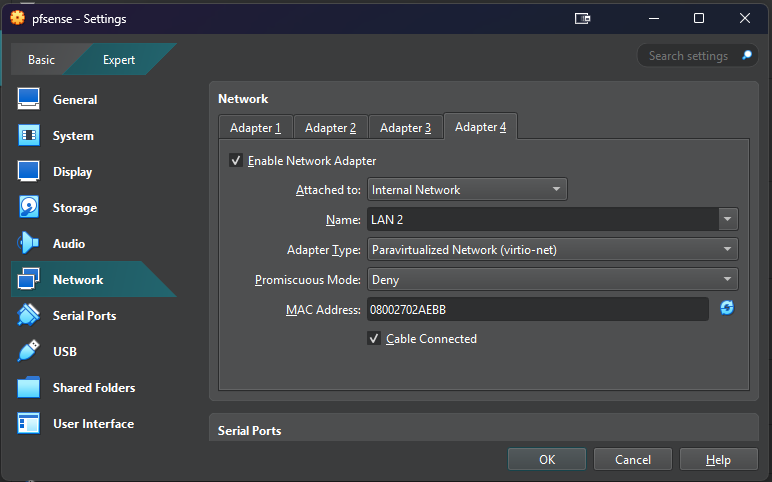
Note: VirtualBox only supports 4 adapters via UI. We’ll add more using CLI later.
🔧 Install pfSense
- Select pfSense VM → Click
Start - Wait for the license screen → Press
Enter - Begin install →
Auto (ZFS)→Proceed with Installation
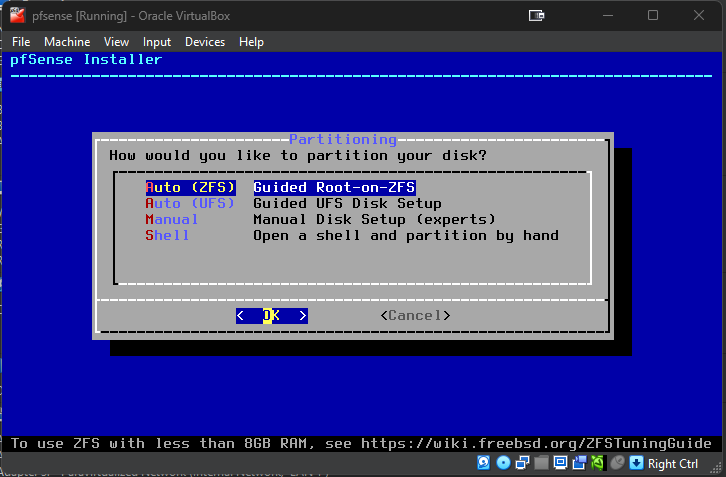
- Choose:
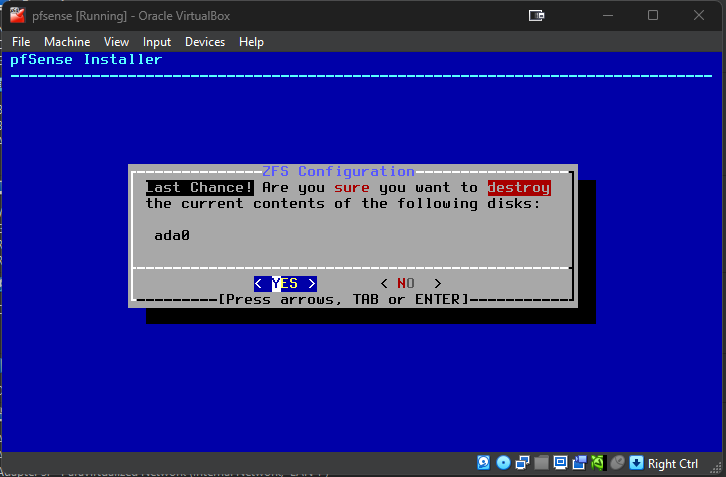
Stripe - No Redundancy - Select disk (
ada0) →Spacebar→Enter - Confirm → Highlight
YES→Enter
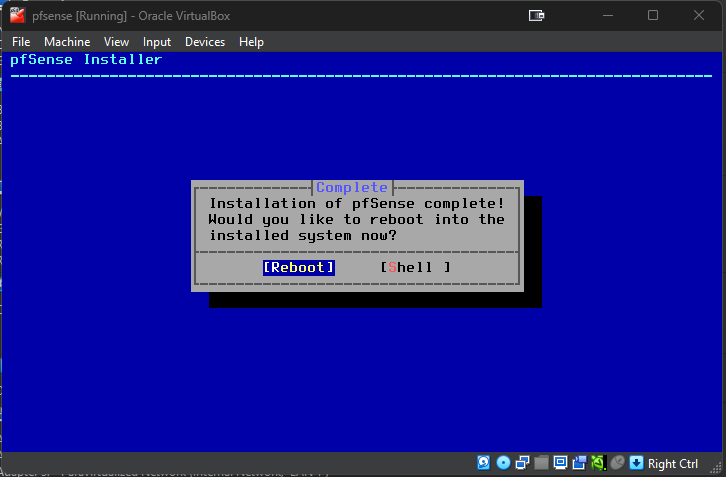
- Reboot after install completes
🔌 Assign Interfaces
When prompted about VLANs → type n
Assign:
- WAN:
vtnet0 - LAN:
vtnet1 - OPT1:
vtnet2 - OPT2:
vtnet3
Type y to confirm
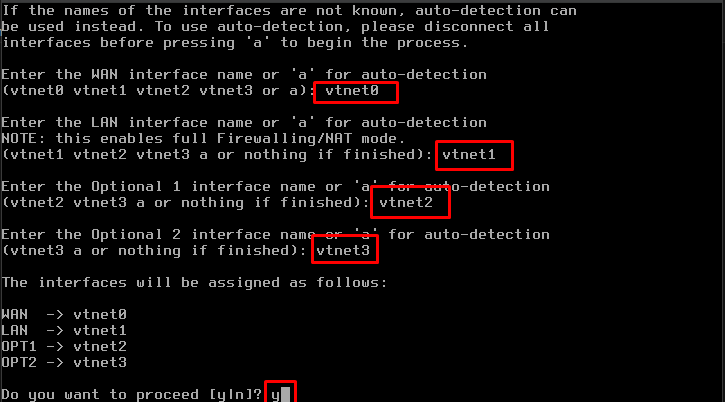
The WAN IP will be different on your system (set by VirtualBox DHCP).
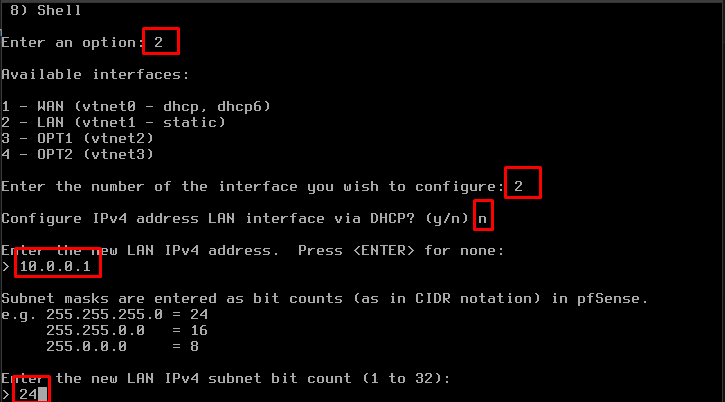
🛠️ Configure Interfaces
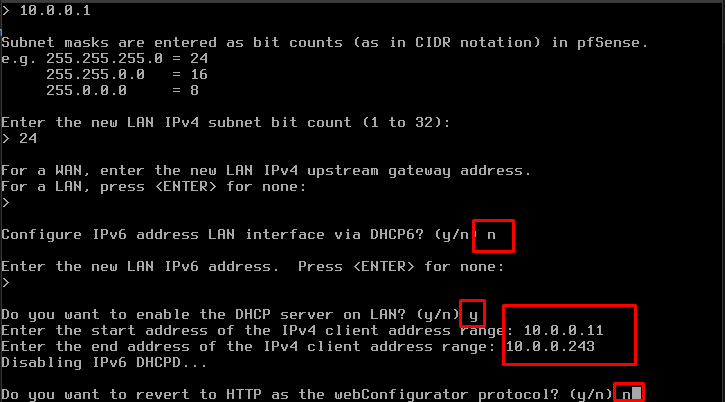
🔐 LAN (vtnet1)
- Press
2→ then2again - Use static IP:
10.0.0.1/24 - Enable DHCP:
- Start:
10.0.0.11 - End:
10.0.0.243
- Start:
- Decline HTTP switch:
n
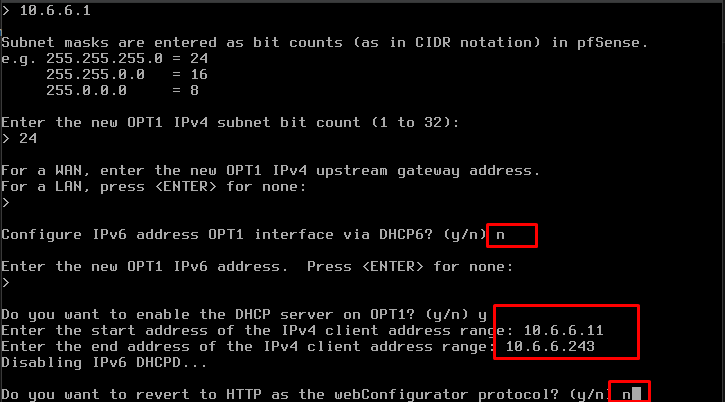
⚔️ OPT1 (vtnet2)
- IP:
10.6.6.1/24 - DHCP Range:
10.6.6.11–10.6.6.243 - Decline HTTP switch:
n
🧬 OPT2 (vtnet3)
- IP:
10.80.80.1/24 - DHCP: Disabled
(AD Domain Controller will handle DHCP)
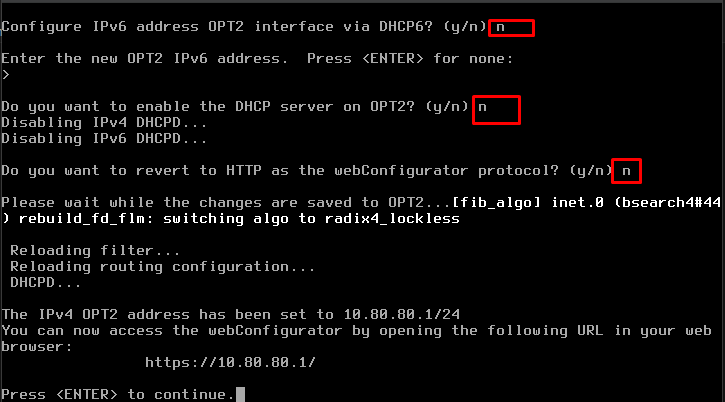
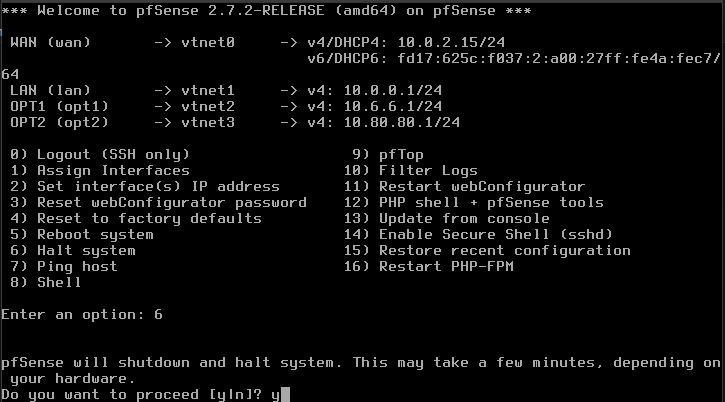
Final Interface IPs:
- LAN:
10.0.0.1- OPT1:
10.6.6.1- OPT2:
10.80.80.1
⏹️ Shutdown pfSense
When you’re done:
1
2
Enter an option: 6
Do you want to proceed?: y
This halts the system safely.
🧽 Post-Install Cleanup
- Go to
Settings → Storage - Select
.isoimage → Click the disk icon →Remove Disk from Virtual Drive
You can delete the
.isoand.iso.gzfiles if you don’t plan to reuse them.
🔜 What’s Next?
We’ll now set up Kali Linux on the LAN interface. This VM will be used to:
- Access the pfSense Web UI
- Configure network rules
- Launch attacks on the
CYBER_RANGE