Home Lab
Security and Pentest Home Lab Environment
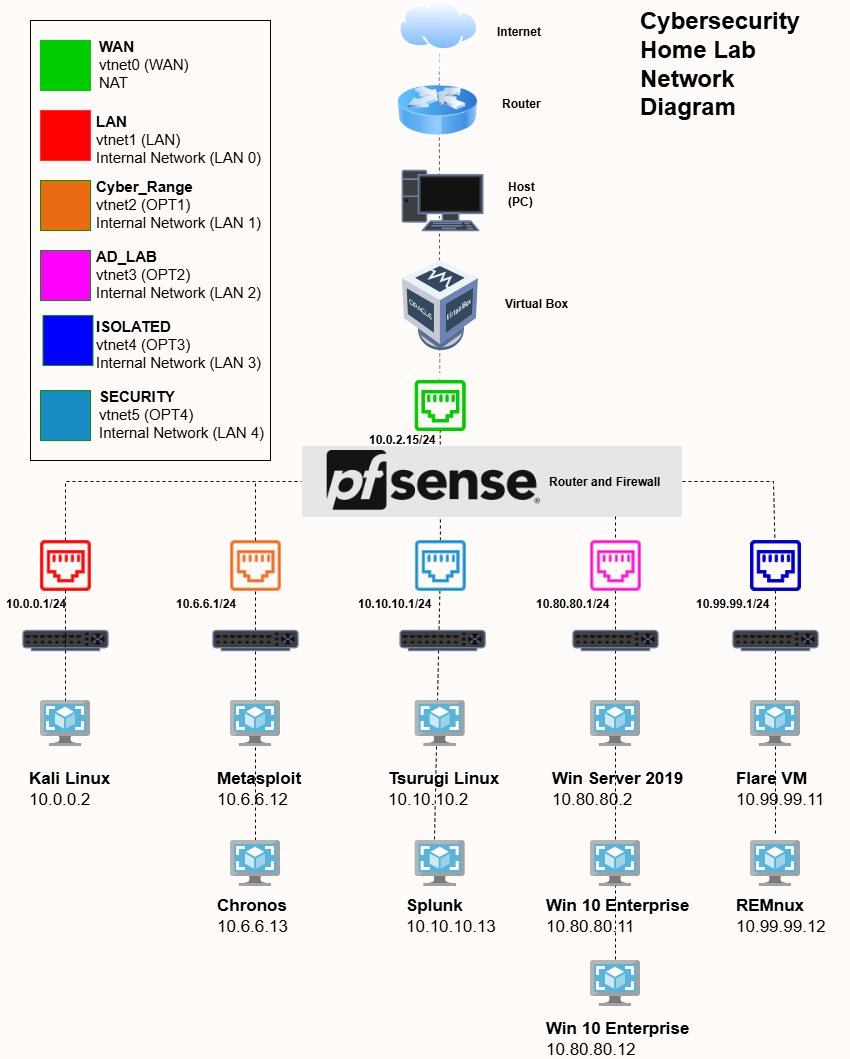
🧭 Home Lab Overview
- pfSense – Gateway and firewall for managing network traffic and segmentation.
- Kali Linux – Management VM with tools for penetration testing and administration.
- Metasploit & Chronos – Used for exploit development and time-based attack simulations.
- Malware Analysis Lab – Isolated environment with Windows and Linux VMs for analyzing malware samples.
- Security VMs
- DFIR (Digital Forensics & Incident Response) – Using tools like Tsurugi Linux.
- SIEM (Security Information and Event Management) – Powered by Splunk for log aggregation and analysis.
- Windows Server – Configured with Active Directory for enterprise-like domain management and authentication scenarios.
- Cyber Range – Collection of vulnerable VMs (e.g., FLARE VM, REMnux) for CTF practice and reverse engineering.
Before Starting
pfSense is basically the core of the whole lab — it’s the router and firewall that everything else connects through. Make sure it’s the first VM you boot up whenever you’re starting the lab. If it’s not running, none of the other VMs will be able to reach the internet or talk to each other. Once pfSense is online, you can start spinning up the rest.
Info
Requirements for System:
64-bit multi-threaded CPU (minimum 4 cores) with Virtualization Support
16GB RAM
250GB Disk Space
🖥️ Checking and Enabling Virtualization for VirtualBox
Before using VirtualBox, your computer must support virtualization technology. On a Windows system, you can verify this by opening Task Manager (press Ctrl + Shift + Esc) and selecting the Performance tab. Look for the Virtualization field — if it says Enabled, no further steps are necessary.
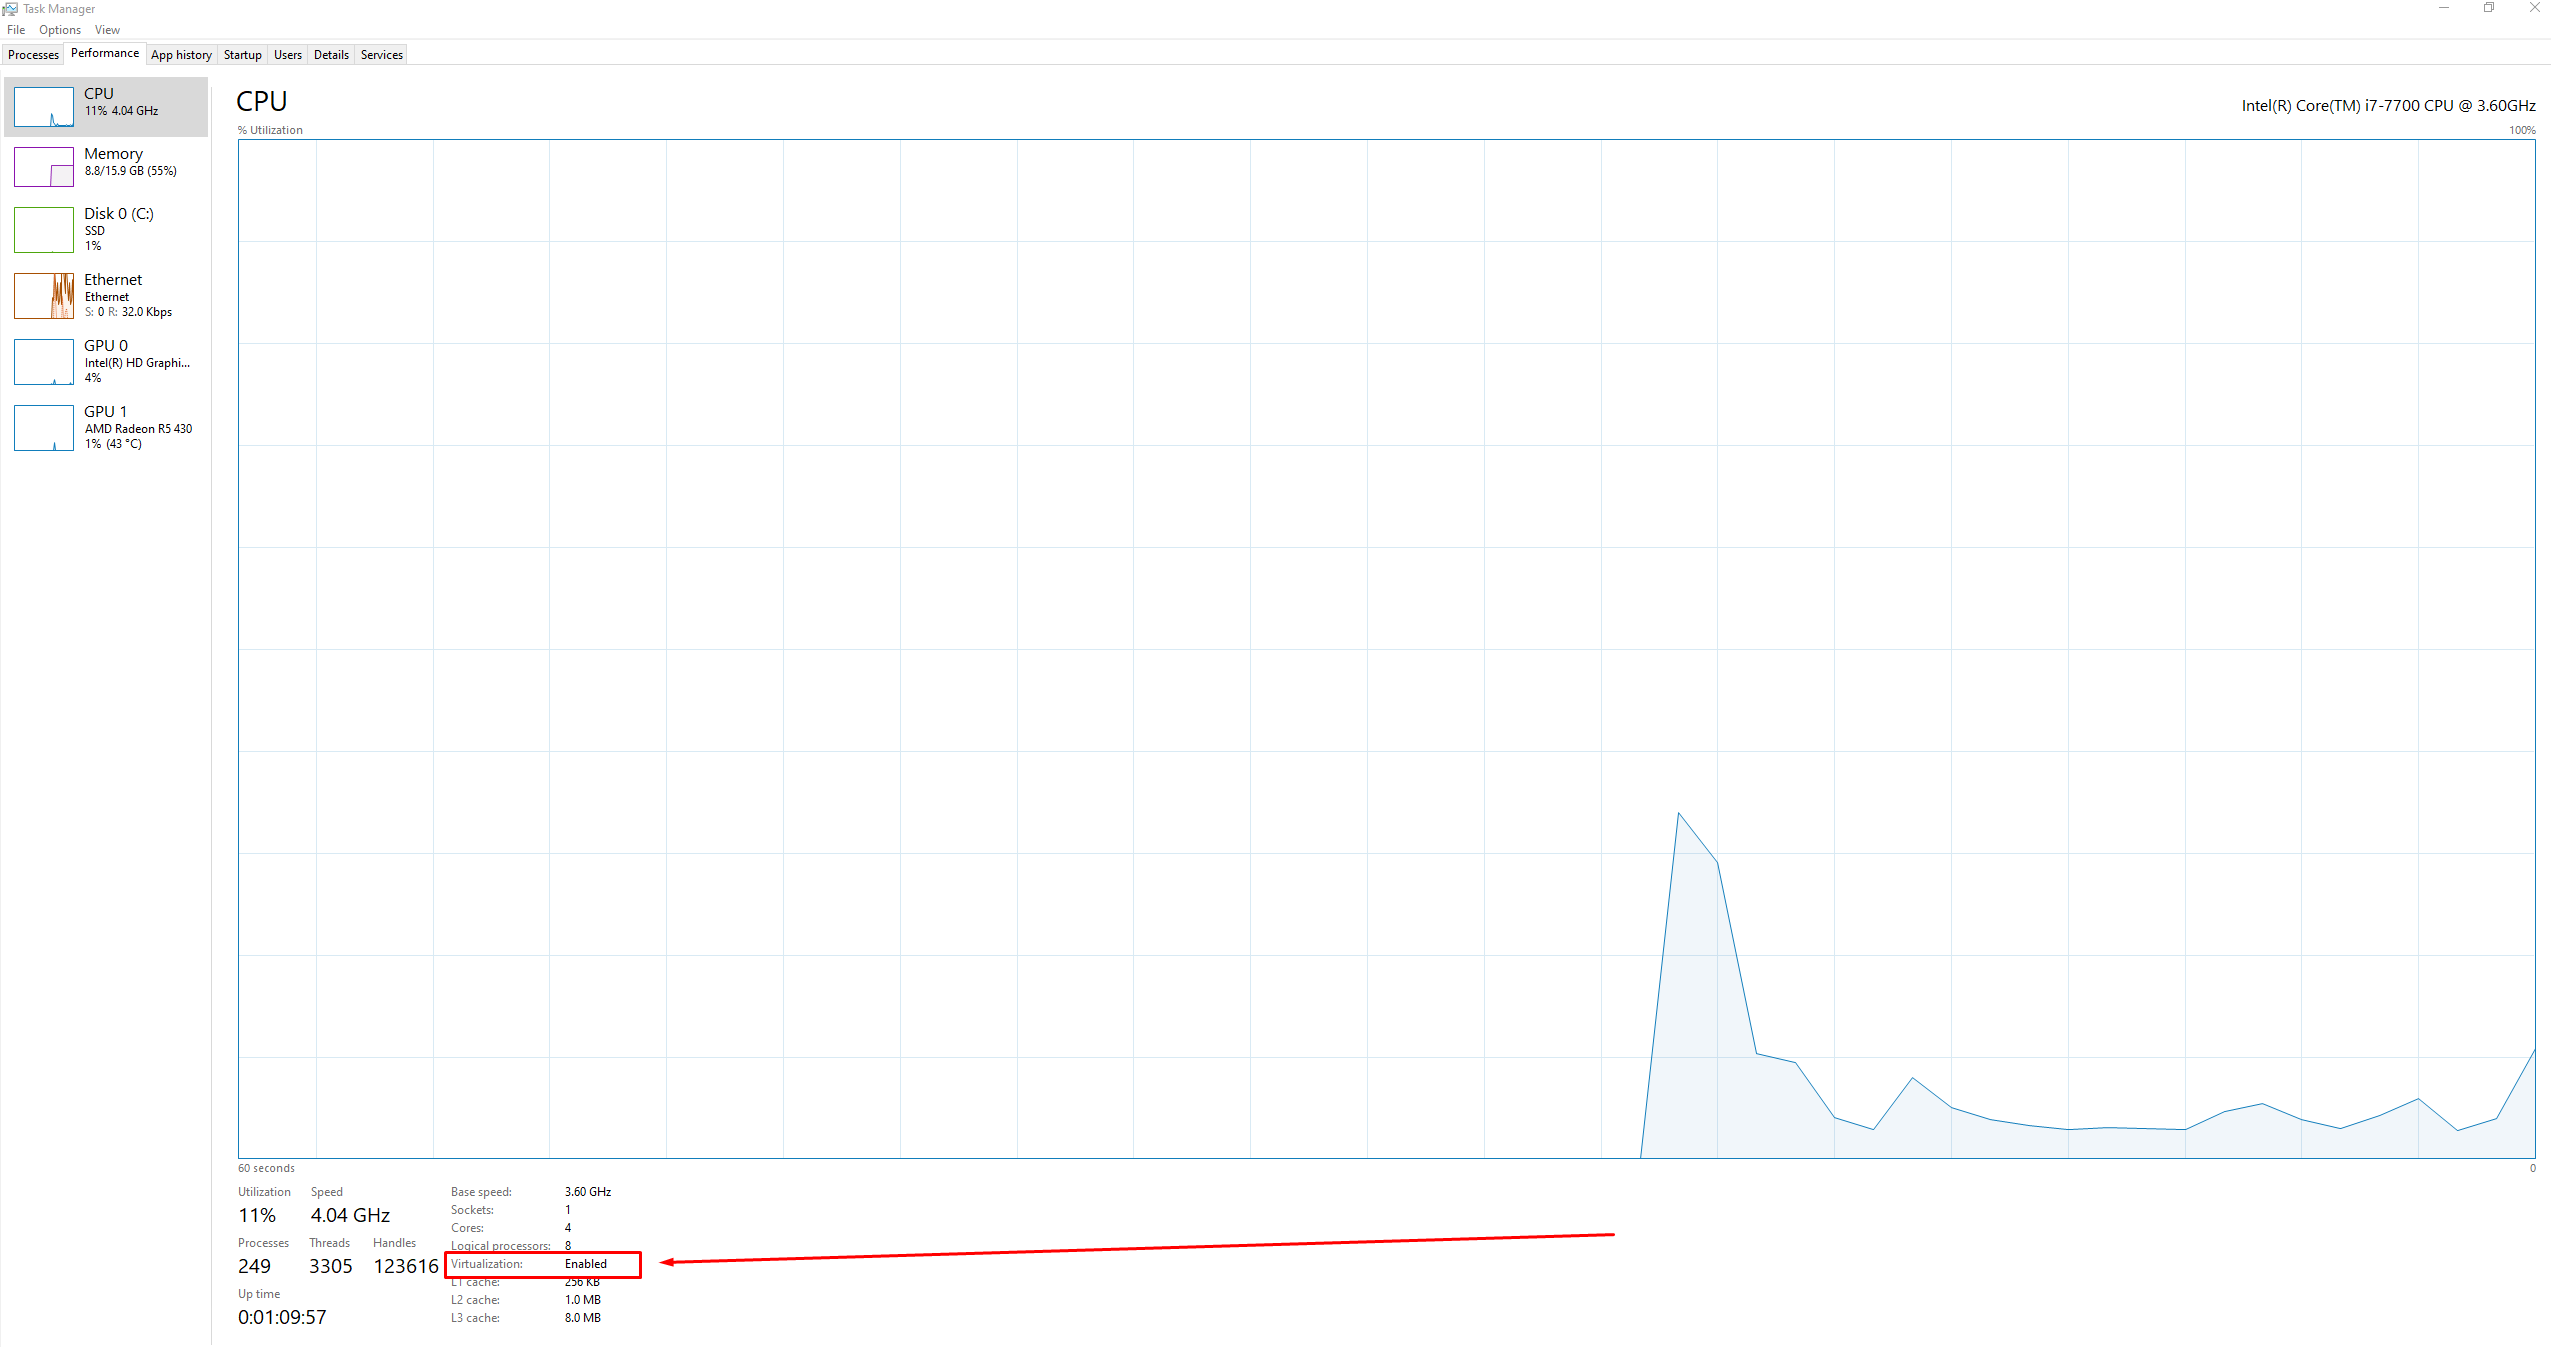
If virtualization is marked as Disabled, it indicates that while your processor does support virtualization, the feature is currently turned off in your system’s BIOS settings. If the virtualization option isn’t listed at all, your processor likely does not support this functionality.
To turn on virtualization, you’ll need to access your computer’s BIOS. Since the process for entering the BIOS can vary by manufacturer and device model, consult your system’s user manual or check online resources specific to your hardware for guidance.
💽 Installing VirtualBox
After enabling virtualization we can start the process of building our homelab.
📥 Download VirtualBox
URL for VB Download:
https://www.virtualbox.org/wiki/Downloads
tip
Download VirtualBox and the VirtualBox Extension Pack
You will then have a .exe and a .vbox-extpack. Open the VirtualBox.exe and start the install.
⚙️ Installing VirtualBox
- Click on the VirtualBox executable to start the setup.
- Click on
Nextto continue. - Leave all the settings at their default values → Click
Next - Click on
Yes→ then clickYesagain - Click on
Install - Click on
Finishto close the installer and start VirtualBox
📦 Installing Guest Additions
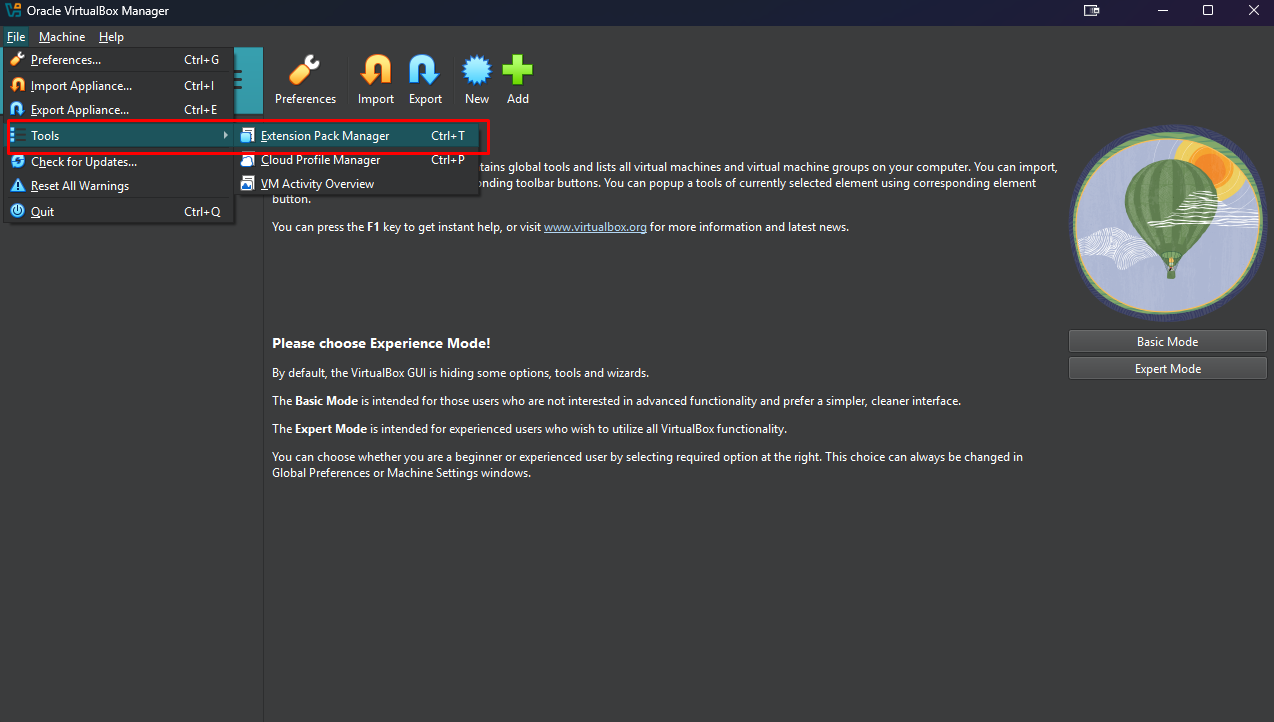
From the menu bar select:
File → Tools → Extension Pack Manager
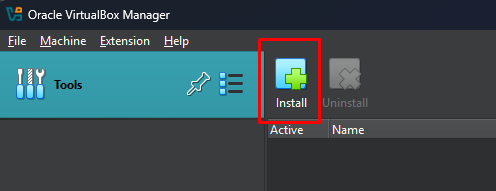
On the Extension Manager page click Install.
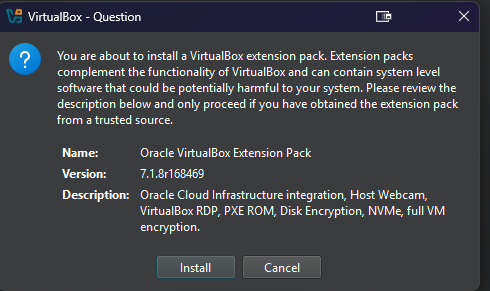
Select the .vbox-extpack file we downloaded → Click Open → Click Install to confirm
Once installation is complete, click the hamburger icon on the right-side of Tools and select Welcome.
UI Changes
With the release of v7.1, Oracle has given VirtualBox GUI a makeover. Make sure to select “Expert” mode by using the toggle at the top left corner. Once in Expert mode, all the options will be identical to the ones from previous versions.
📁 Changing VM Storage Location
To change the default VM storage location:
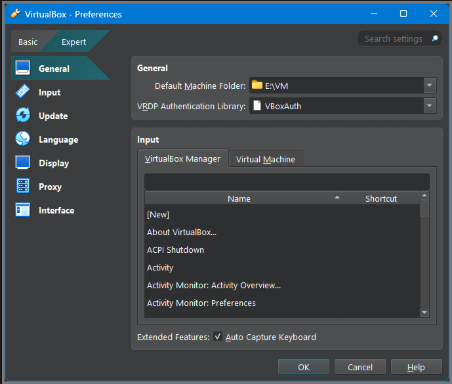
- From the menu bar select:
File → Preferences - Under the
Generaltab, change the value of Default Machine Folder
In the next module, we will start with the installation and configuration of pfSense.