Burp Suite: The Basics
Burp Suite from TryHackMe

Intro to Burp Suite
In essence, Burp Suite is a Java-based framework designed to serve as a comprehensive solution for conducting web application penetration testing. It has become the industry standard tool for hands-on security assessments of web and mobile applications, including those that rely on application programming interfaces (APIs).
Burp Suite is available in different editions. For our purposes, we will focus on the Burp Suite Community Edition, which is freely accessible for non-commercial use within legal boundaries. However, it’s worth noting that Burp Suite also offers Professional and Enterprise editions, which come with advanced features and require licensing:
Burp Suite Professional is an unrestricted version of Burp Suite Community. It comes with features such as:
An automated vulnerability scanner.
A fuzzer/brute-forcer that isn’t rate limited.
Saving projects for future use and report generation.
A built-in API to allow integration with other tools.
Unrestricted access to add new extensions for greater functionality.
Access to the Burp Suite Collaborator (effectively providing a unique request catcher self-hosted or running on a Portswigger-owned server).
In short, Burp Suite Professional is a highly potent tool, making it a preferred choice for professionals in the field.
Burp Suite Enterprise, in contrast to the community and professional editions, is primarily utilized for continuous scanning. It features an automated scanner that periodically scans web applications for vulnerabilities, similar to how tools like Nessus perform automated infrastructure scanning. Unlike the other editions, which allow manual attacks from a local machine, Burp Suite Enterprise resides on a server and constantly scans the target web applications for potential vulnerabilities.
Features of Burp Suite
Although Burp Suite Community offers a more limited feature set compared to the Professional edition, it still provides an impressive array of tools that are highly valuable for web application testing. Let’s explore some of the key features:
Proxy: The Burp Proxy is the most renowned aspect of Burp Suite. It enables interception and modification of requests and responses while interacting with web applications.
Repeater: Another well-known feature. Repeater allows for capturing, modifying, and resending the same request multiple times. This functionality is particularly useful when crafting payloads through trial and error (e.g., in SQLi - Structured Query Language Injection) or testing the functionality of an endpoint for vulnerabilities.
Intruder: Despite rate limitations in Burp Suite Community, Intruder allows for spraying endpoints with requests. It is commonly utilized for brute-force attacks or fuzzing endpoints.
Decoder: Decoder offers a valuable service for data transformation. It can decode captured information or encode payloads before sending them to the target. While alternative services exist for this purpose, leveraging Decoder within Burp Suite can be highly efficient.
Comparer: As the name suggests, Comparer enables the comparison of two pieces of data at either the word or byte level. While not exclusive to Burp Suite, the ability to send potentially large data segments directly to a comparison tool with a single keyboard shortcut significantly accelerates the process.
Sequencer: Sequencer is typically employed when assessing the randomness of tokens, such as session cookie values or other supposedly randomly generated data. If the algorithm used for generating these values lacks secure randomness, it can expose avenues for devastating attacks.
The Dashboard
The Burp Dashboard:
Tasks: The Tasks menu allows you to define background tasks that Burp Suite will perform while you use the application. In Burp Suite Community, the default “Live Passive Crawl” task, which automatically logs the pages visited, is sufficient for our purposes in this module. Burp Suite Professional offers additional features like on-demand scans.
Event log: The Event log provides information about the actions performed by Burp Suite, such as starting the proxy, as well as details about connections made through Burp.
Issue Activity: This section is specific to Burp Suite Professional. It displays the vulnerabilities identified by the automated scanner, ranked by severity and filterable based on the certainty of the vulnerability.
Advisory: The Advisory section provides more detailed information about the identified vulnerabilities, including references and suggested remediations. This information can be exported into a report. In Burp Suite Community, this section may not show any vulnerabilities.
Navigation
In Burp Suite, the default navigation is primarily done through the top menu bars, which allow you to switch between modules and access various sub-tabs within each module. The sub-tabs appear in a second menu bar directly below the main menu bar.
Here’s how the navigation works:
Module Selection: The top row of the menu bar displays the available modules in Burp Suite. You can click on each module to switch between them. For example, the Burp Proxy module is selected in the image below.
Sub-Tabs: If a selected module has multiple sub-tabs, they can be accessed through the second menu bar that appears directly below the main menu bar. These sub-tabs often contain module-specific settings and options. For example, in the image above, the Proxy Intercept sub-tab is selected within the Burp Proxy module.
Detaching Tabs: If you prefer to view multiple tabs separately, you can detach them into separate windows. To do this, go to the Window option in the application menu above the Module Selection bar. From there, choose the “Detach” option, and the selected tab will open in a separate window. The detached tabs can be reattached using the same method.
Burp Suite also provides keyboard shortcuts for quick navigation to key tabs. By default, the following shortcuts are available:
| Shortcut | Tab |
|---|---|
| Ctrl + Shift + D | Dashboard |
| Ctrl + Shift + T | Target tab |
| Ctrl + Shift + P | Proxy tab |
| Ctrl + Shift + I | Intruder tab |
| Ctrl + Shift + R | Repeater tab |
There are two types of settings: Global settings (also known as User settings) and Project settings.
Global Settings: These settings affect the entire Burp Suite installation and are applied every time you start the application. They provide a baseline configuration for your Burp Suite environment.
Project Settings: These settings are specific to the current project and apply only during the session. However, please note that Burp Suite Community Edition does not support saving projects, so any project-specific options will be lost when you close Burp.
In the Settings window, you will find a menu on the left-hand side. This menu allows you to switch between different types of settings, including:
Search: Enables searching for specific settings using keywords.
Type filter: Filters the settings for User and Project options.
User settings: Shows settings that affect the entire Burp Suite installation.
Project settings: Displays settings specific to the current project.
Categories: Allows selecting settings by category.
It’s worth noting that many tools within Burp Suite provide shortcuts to specific categories of settings. For example, the Proxy module includes a Proxy settings button that opens the settings window directly to the relevant proxy section.
Key Points to Understand About the Burp Proxy
Intercepting Requests: When requests are made through the Burp Proxy, they are intercepted and held back from reaching the target server. The requests appear in the Proxy tab, allowing for further actions such as forwarding, dropping, editing, or sending them to other Burp modules. To disable the intercept and allow requests to pass through the proxy without interruption, click the Intercept is on button.
Taking Control: The ability to intercept requests empowers testers to gain complete control over web traffic, making it invaluable for testing web applications.
Capture and Logging: Burp Suite captures and logs requests made through the proxy by default, even when the interception is turned off. This logging functionality can be helpful for later analysis and review of prior requests.
WebSocket Support: Burp Suite also captures and logs WebSocket communication, providing additional assistance when analysing web applications.
Logs and History: The captured requests can be viewed in the HTTP history and WebSockets history sub-tabs, allowing for retrospective analysis and sending the requests to other Burp modules as needed.
Proxy-specific options can be accessed by clicking the Proxy settings button. These options provide extensive control over the Proxy’s behaviour and functionality. Familiarise yourself with these options to optimize your Burp Proxy usage.
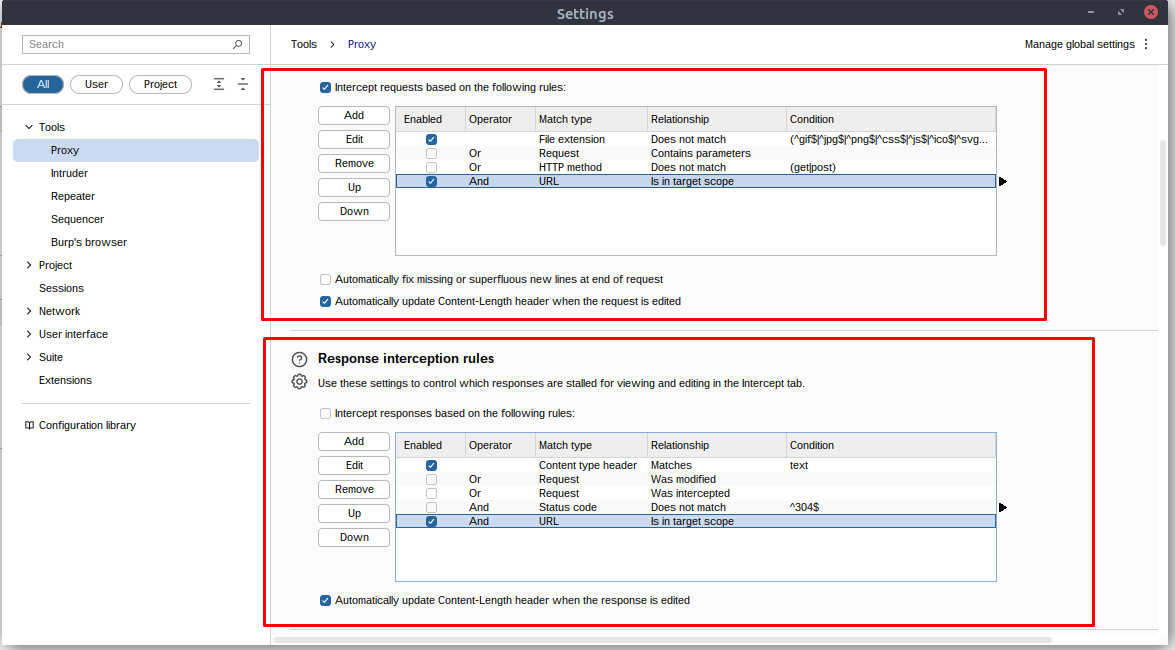
Some Notable Features in the Proxy Settings
Response Interception: By default, the proxy does not intercept server responses unless explicitly requested on a per-request basis. The “Intercept responses based on the following rules” checkbox, along with the defined rules, allows for a more flexible response interception.
Match and Replace: The “Match and Replace” section in the Proxy settings enables the use of regular expressions (regex) to modify incoming and outgoing requests. This feature allows for dynamic changes, such as modifying the user agent or manipulating cookies.
Connecting through the Proxy (FoxyProxy)
Here are the steps to configure the Burp Suite Proxy with FoxyProxy:
Install FoxyProxy: Download and install the FoxyProxy Basic extension.
Access FoxyProxy Options: Once installed, a button will appear at the top right of the Firefox browser. Click on the FoxyProxy button to access the FoxyProxy options pop-up.
Create Burp Proxy Configuration: In the FoxyProxy options pop-up, click the Options button. This will open a new browser tab with the FoxyProxy configurations. Click the Add button to create a new proxy configuration.
Add Proxy Details: On the “Add Proxy” page, fill in the following values:
Title: Burp (or any preferred name) Proxy IP: 127.0.0.1 Port: 8080
Save Configuration: Click Save to save the Burp Proxy configuration.
Activate Proxy Configuration: Click on the FoxyProxy icon at the top-right of the Firefox browser and select the Burp configuration. This will redirect your browser traffic through 127.0.0.1:8080. Note that Burp Suite must be running for your browser to make requests when this configuration is activated.
Enable Proxy Intercept in Burp Suite: Switch to Burp Suite and ensure that Intercept is turned on in the Proxy tab.
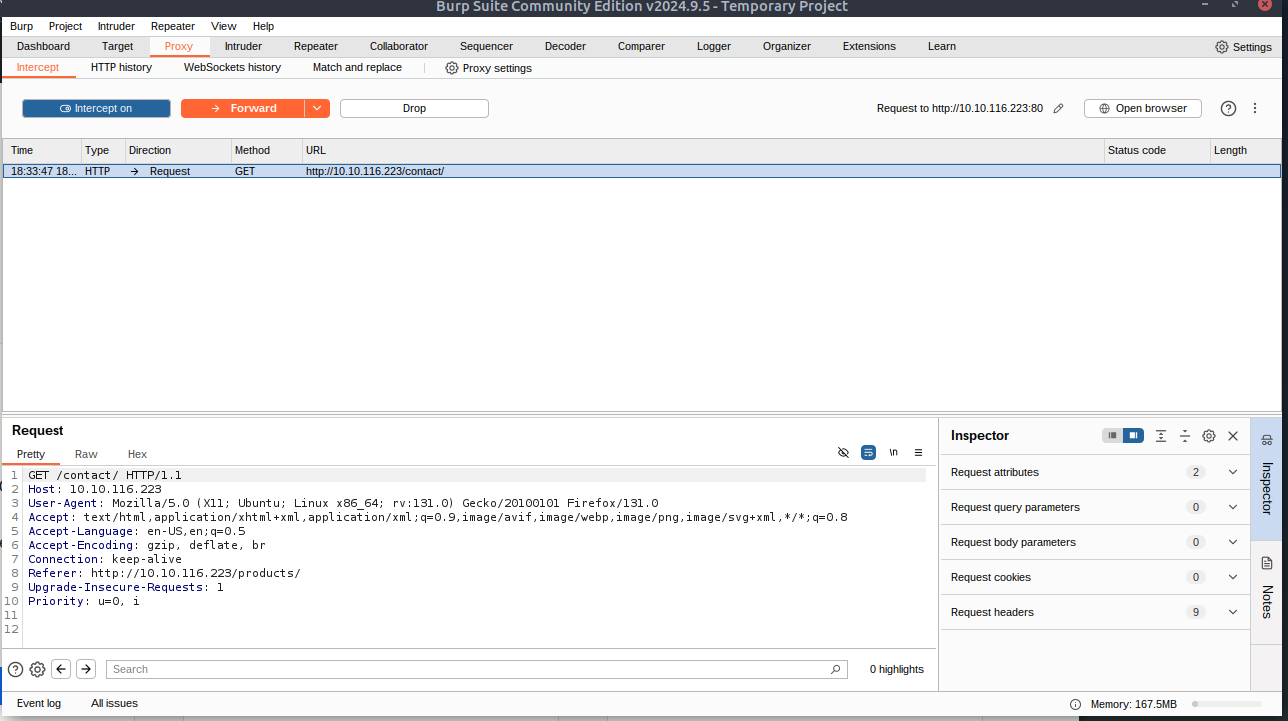
Test the Proxy: Open Firefox and try accessing a website, such as the homepage for http://10.10.116.223/. Your browser will hang, and the proxy will populate with the HTTP request. Congratulations, you have successfully intercepted your first request!
Remember the following:
When the proxy configuration is active, and the intercept is switched on in Burp Suite, your browser will hang whenever you make a request.
Be cautious not to leave the intercept switched on unintentionally, as it can prevent your browser from making any requests.
Right-clicking on a request in Burp Suite allows you to perform various actions, such as forwarding, dropping, sending to other tools, or selecting options from the right-click menu.
Take note of these details as you begin using the Burp Suite Proxy.
Site Map and Issue Definitions
The Target tab in Burp Suite provides more than just control over the scope of our testing. It consists of three sub-tabs:
Site map: This sub-tab allows us to map out the web applications we are targeting in a tree structure. Every page that we visit while the proxy is active will be displayed on the site map. This feature enables us to automatically generate a site map by simply browsing the web application. In Burp Suite Professional, we can also use the site map to perform automated crawling of the target, exploring links between pages and mapping out as much of the site as possible. Even with Burp Suite Community, we can still utilize the site map to accumulate data during our initial enumeration steps. It is particularly useful for mapping out APIs, as any API endpoints accessed by the web application will be captured in the site map.
Issue definitions: Although Burp Community does not include the full vulnerability scanning functionality available in Burp Suite Professional, we still have access to a list of all the vulnerabilities that the scanner looks for. The Issue definitions section provides an extensive list of web vulnerabilities, complete with descriptions and references. This resource can be valuable for referencing vulnerabilities in reports or assisting in describing a particular vulnerability that may have been identified during manual testing.
Scope settings: This setting allows us to control the target scope in Burp Suite. It enables us to include or exclude specific domains/IPs to define the scope of our testing. By managing the scope, we can focus on the web applications we are specifically targeting and avoid capturing unnecessary traffic.
Overall, the Target tab offers features beyond scoping, allowing us to map out web applications, fine-tune our target scope, and access a comprehensive list of web vulnerabilities for reference purposes.
Challenge
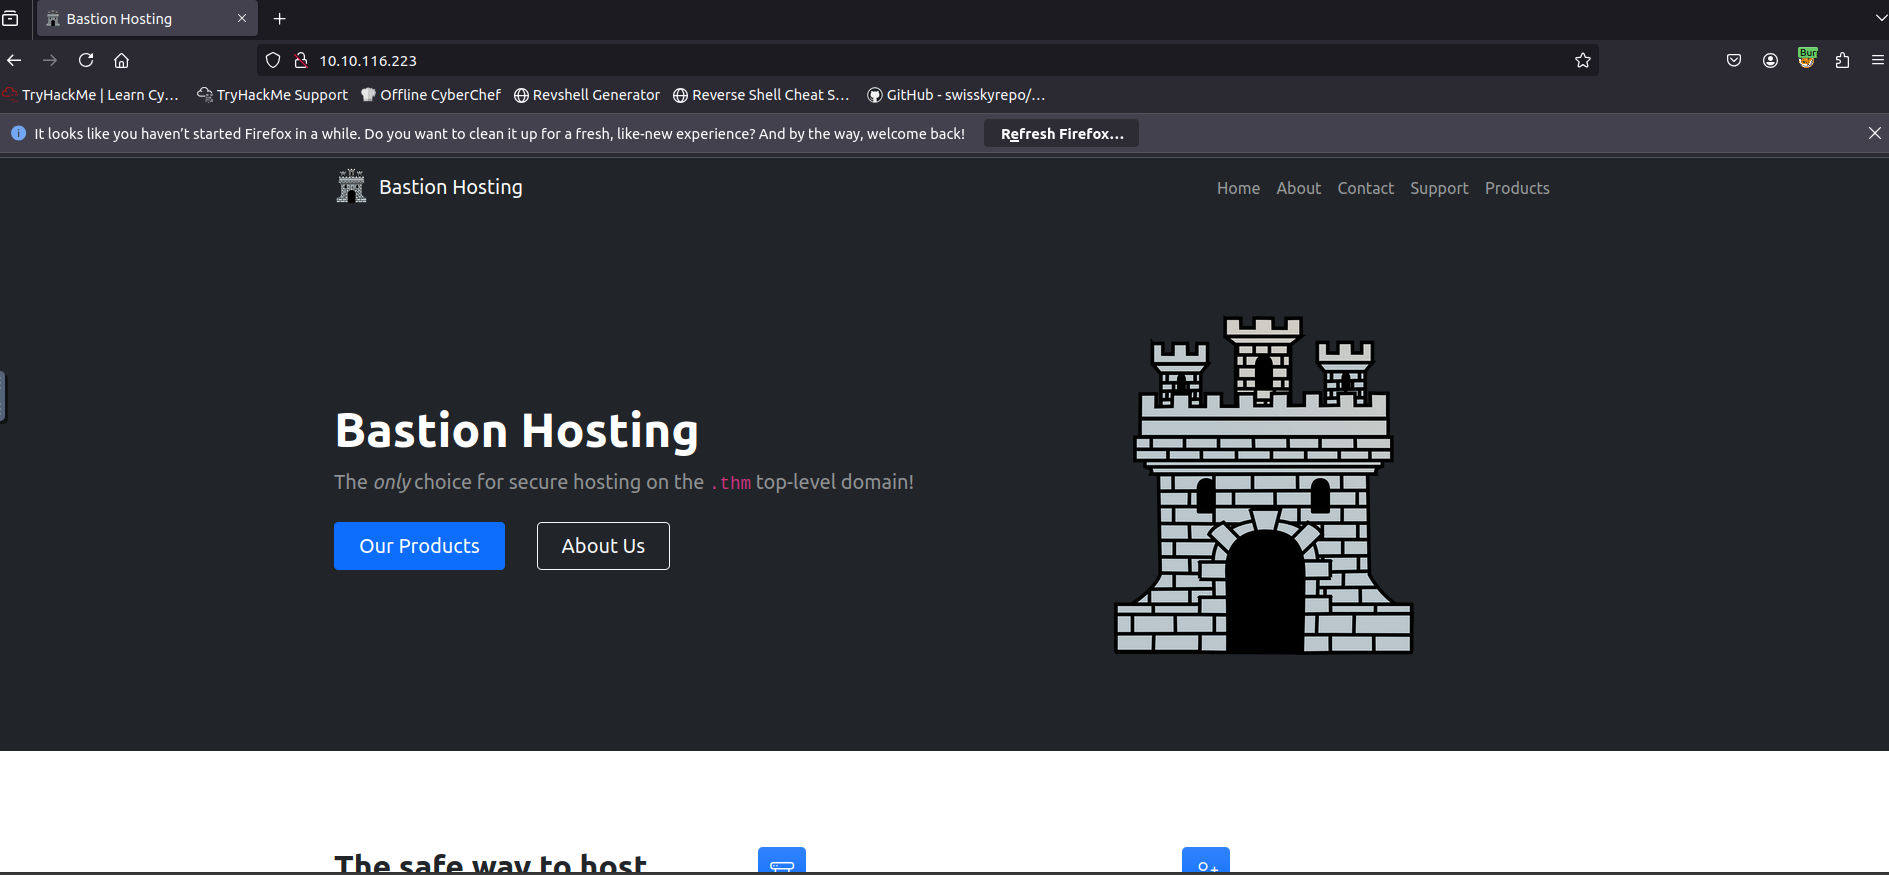
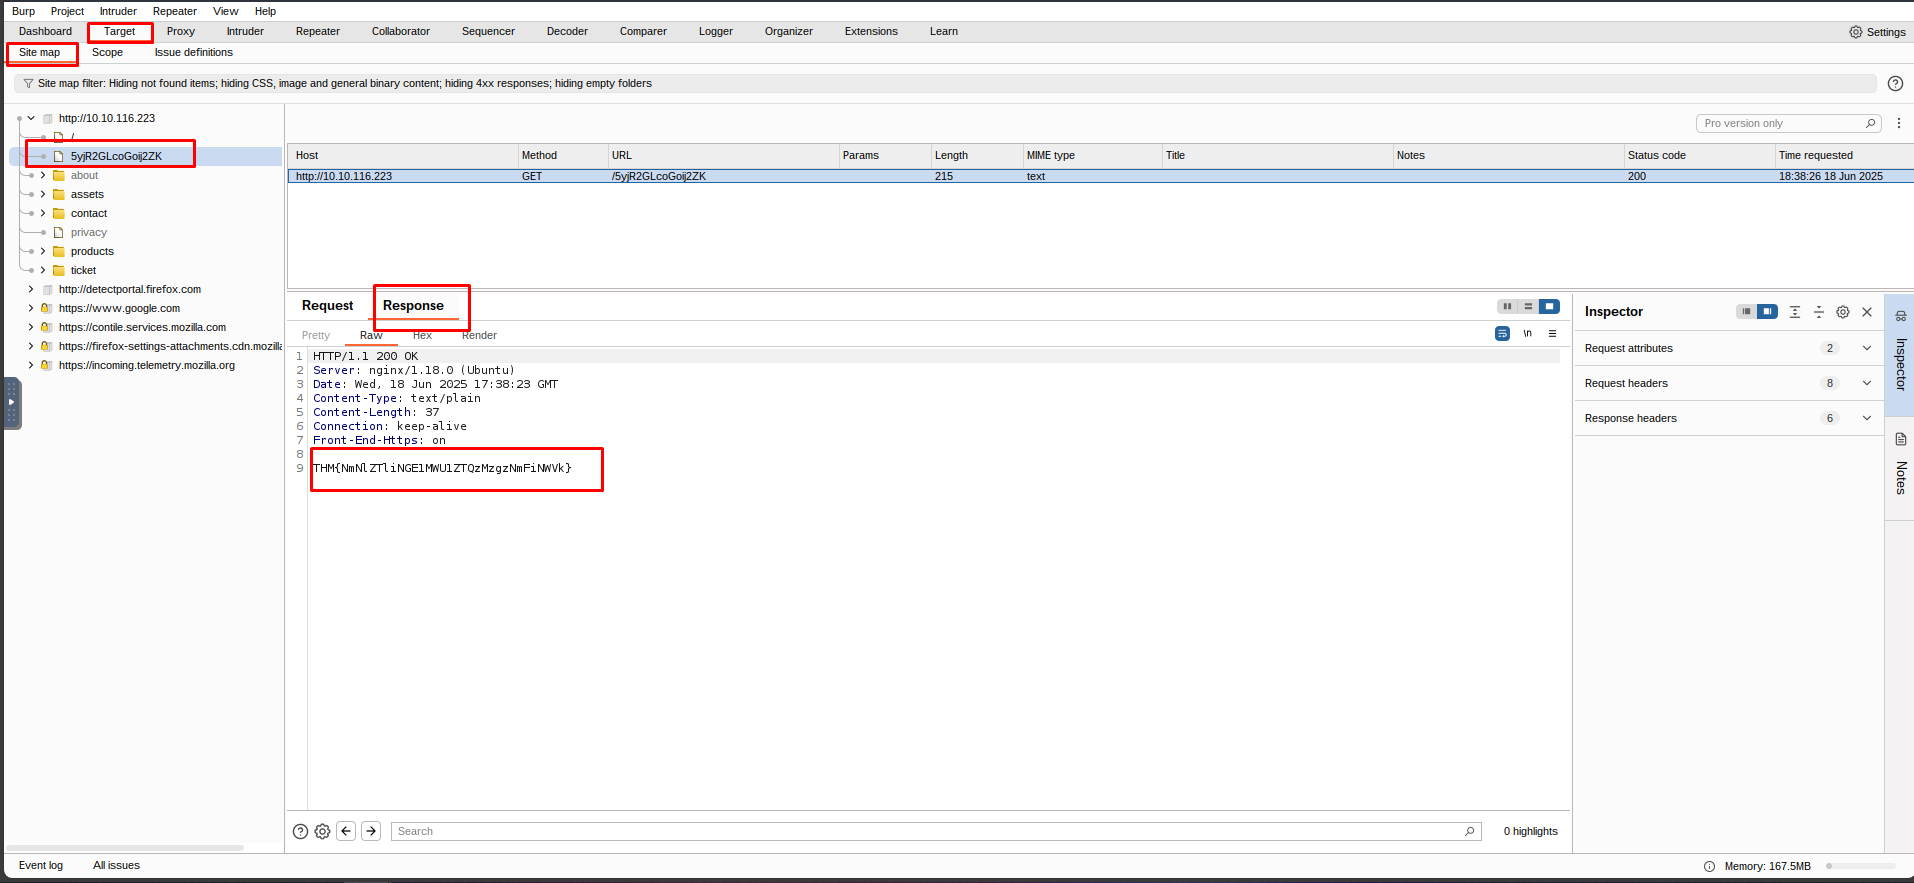
Take a look around the site on http://10.10.116.223/ — we will be using this a lot throughout the module. Visit every other page that is linked on the homepage, then check your sitemap — one endpoint should stand out as being very unusual!
Visit this in your browser (or use the “Response” section of the site map entry for that endpoint)
What is the flag you receive after visiting the unusual endpoint?
Scoping and Targeting
Finally, we come to one of the most important aspects of using the Burp Proxy: Scoping.
Capturing and logging all of the traffic can quickly become overwhelming and inconvenient, especially when we only want to focus on specific web applications. This is where scoping comes in.
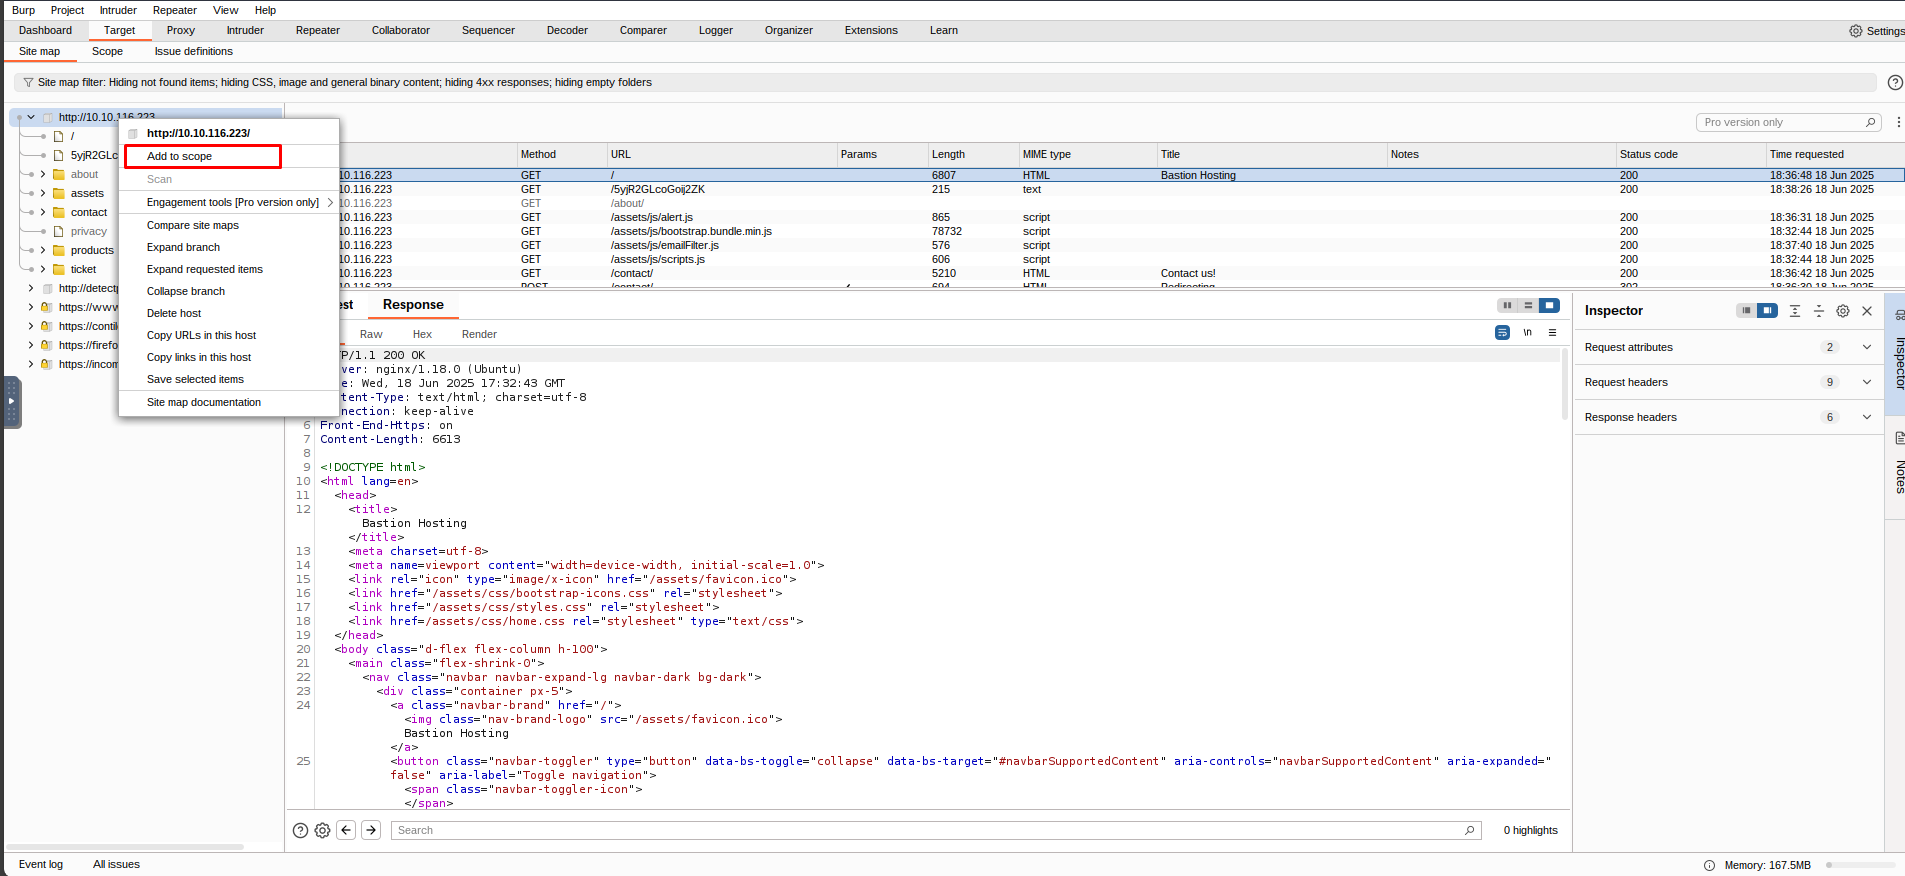
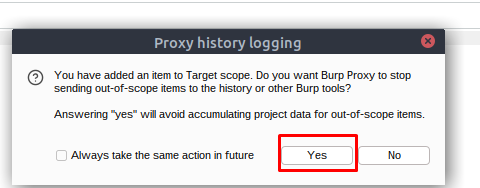
By setting a scope for the project, we can define what gets proxied and logged in Burp Suite. We can restrict Burp Suite to target only the specific web application(s) we want to test. The easiest way to do this is by switching to the Target tab, right-clicking on our target from the list on the left, and selecting Add To Scope. Burp will then prompt us to choose whether we want to stop logging anything that is not in scope, and in most cases, we want to select yes.
To check our scope, we can switch to the Scope settings sub-tab within the Target tab.
The Scope settings window allows us to control our target scope by including or excluding domains/IPs. This section is powerful and worth spending time getting familiar with.
However, even if we disabled logging for out-of-scope traffic, the proxy will still intercept everything. To prevent this, we need to go to the Proxy settings sub-tab and select And URL Is in target scope from the “Intercept Client Requests” section.
Enabling this option ensures that the proxy completely ignores any traffic that is not within the defined scope, resulting in a cleaner traffic view in Burp Suite.
Add http://10.10.116.223/ to your scope and change the proxy settings to only intercept traffic to in-scope targets.
Proxying HTTPS
When intercepting HTTP traffic, we may encounter an issue when navigating to sites with TLS enabled. For example, when accessing a site like https://google.com/, we may receive an error indicating that the PortSwigger Certificate Authority (CA) is not authorised to secure the connection. This happens because the browser does not trust the certificate presented by Burp Suite.
To overcome this issue, we can manually add the PortSwigger CA certificate to our browser’s list of trusted certificate authorities. Here’s how to do it:
Download the CA Certificate: With the Burp Proxy activated, navigate to http://burp/cert. This will download a file called cacert.der. Save this file somewhere on your machine.
Access Firefox Certificate Settings: Type about:preferences into your Firefox URL bar and press Enter. This will take you to the Firefox settings page. Search the page for “certificates” and click on the View Certificates button.
Import the CA Certificate: In the Certificate Manager window, click on the Import button. Select the cacert.der file that you downloaded in the previous step.
Set Trust for the CA Certificate: In the subsequent window that appears, check the box that says “Trust this CA to identify websites” and click OK.
By completing these steps, we have added the PortSwigger CA certificate to our list of trusted certificate authorities. Now, we should be able to visit any TLS-enabled site without encountering the certificate error.
By following these instructions, you can ensure that your browser trusts the PortSwigger CA certificate and securely communicates with TLS-enabled websites through the Burp Suite Proxy.
Example Atttack
Let’s go through a simplified real-world example.
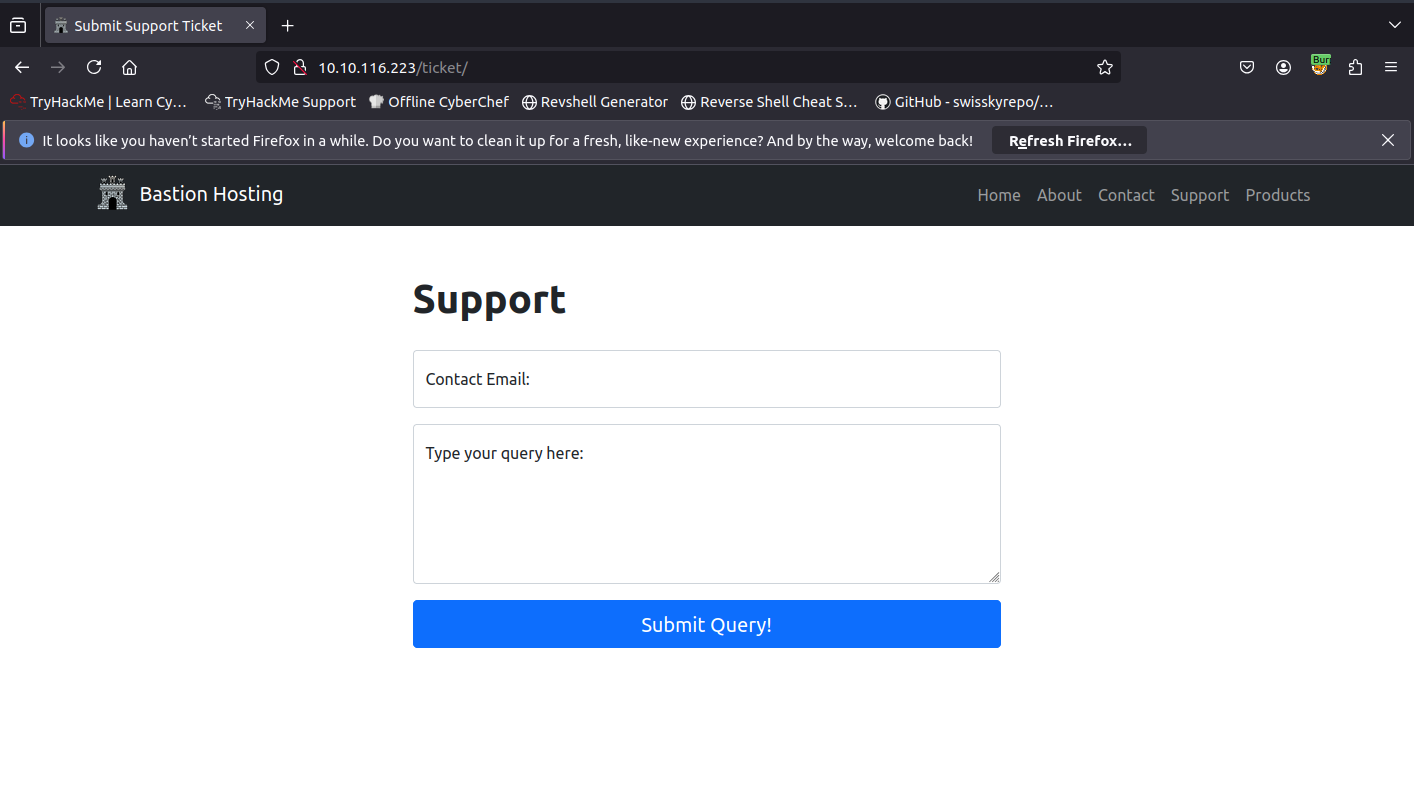
We will start by taking a look at the support form at http://10.10.116.223/ticket/:
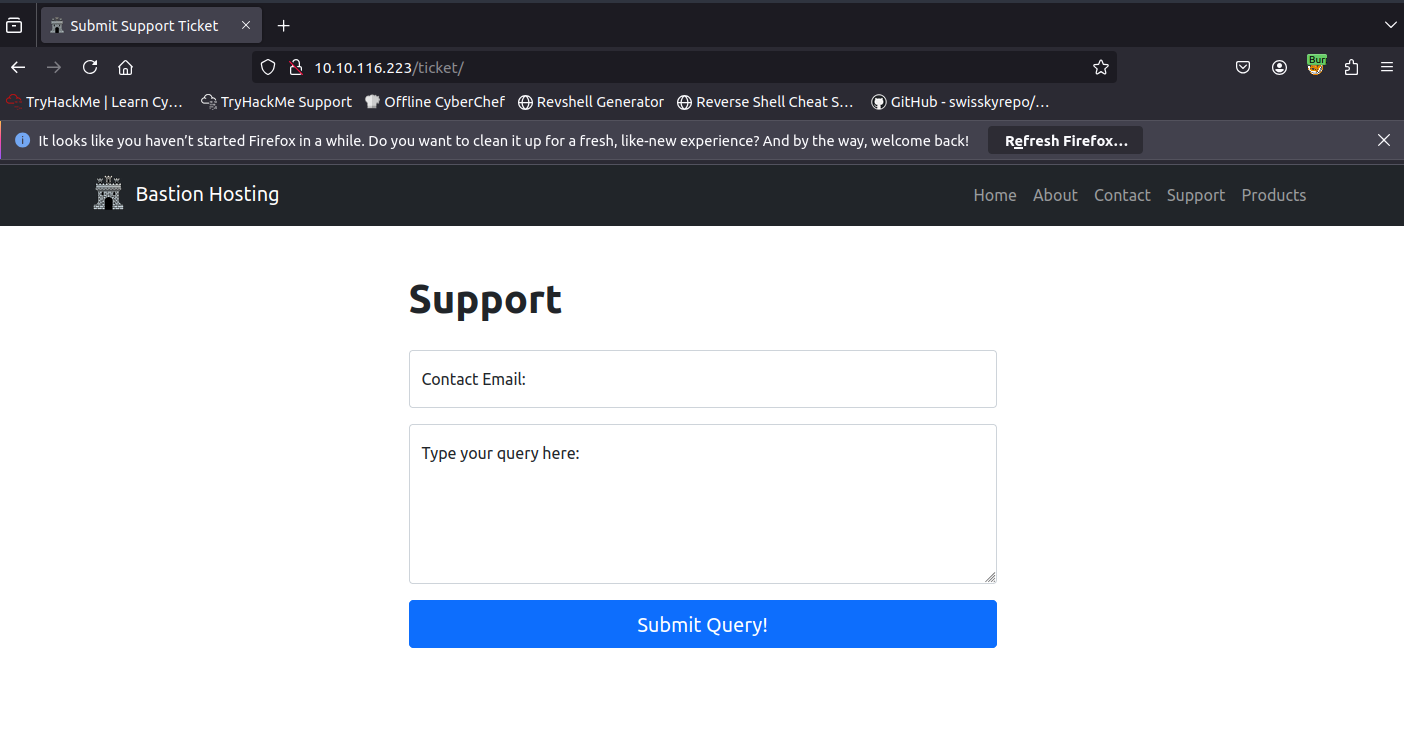
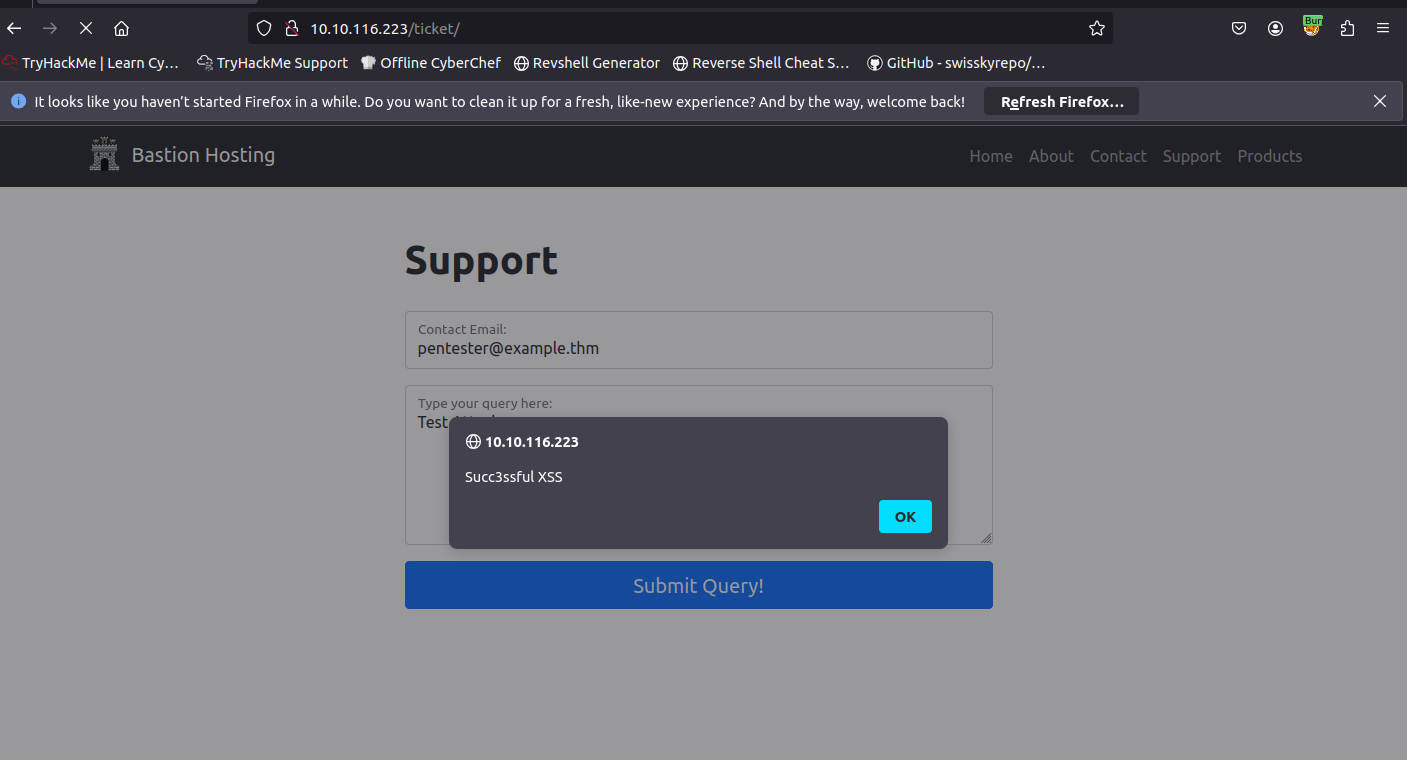
In a real-world web app pentest, we would test this for a variety of things, one of which would be Cross-Site Scripting (or XSS). If you have not yet encountered XSS, it can be thought of as injecting a client-side script (usually in Javascript) into a webpage in such a way that it executes. There are various kinds of XSS – the type that we are using here is referred to as “Reflected” XSS, as it only affects the person making the web request.
Try typing: <script>alert("Succ3ssful XSS")</script>,` into the “Contact Email” field. You should find that there is a client-side filter in place which prevents you from adding any special characters that aren’t allowed in email addresses:
Let’s focus on simply bypassing the filter for now.
First, make sure that your Burp Proxy is active and that intercept is on.
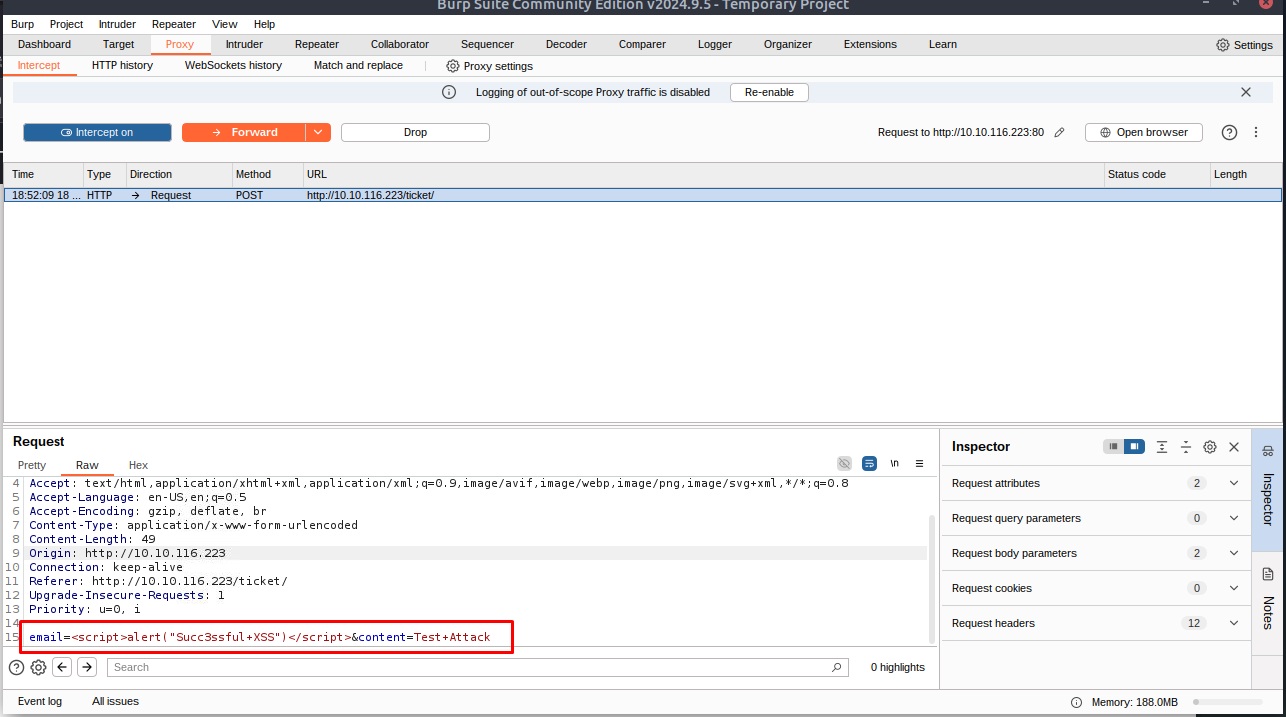
Now, enter some legitimate data into the support form. For example: “pentester@example.thm” as an email address, and “Test Attack” as a query.
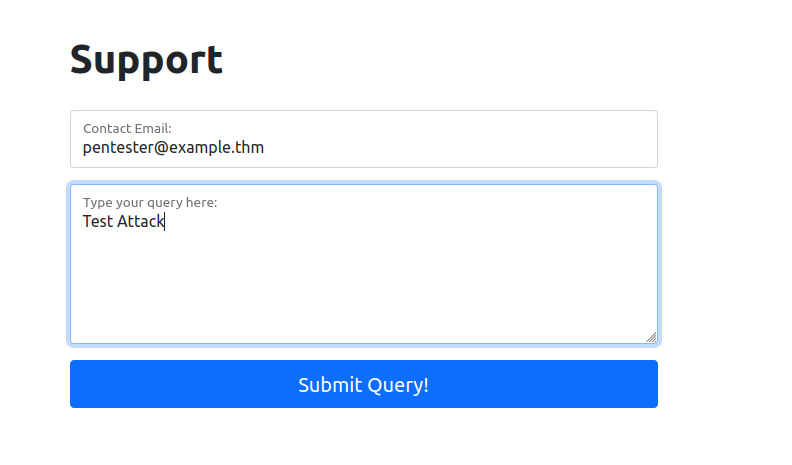
Submit the form — the request should be intercepted by the proxy.
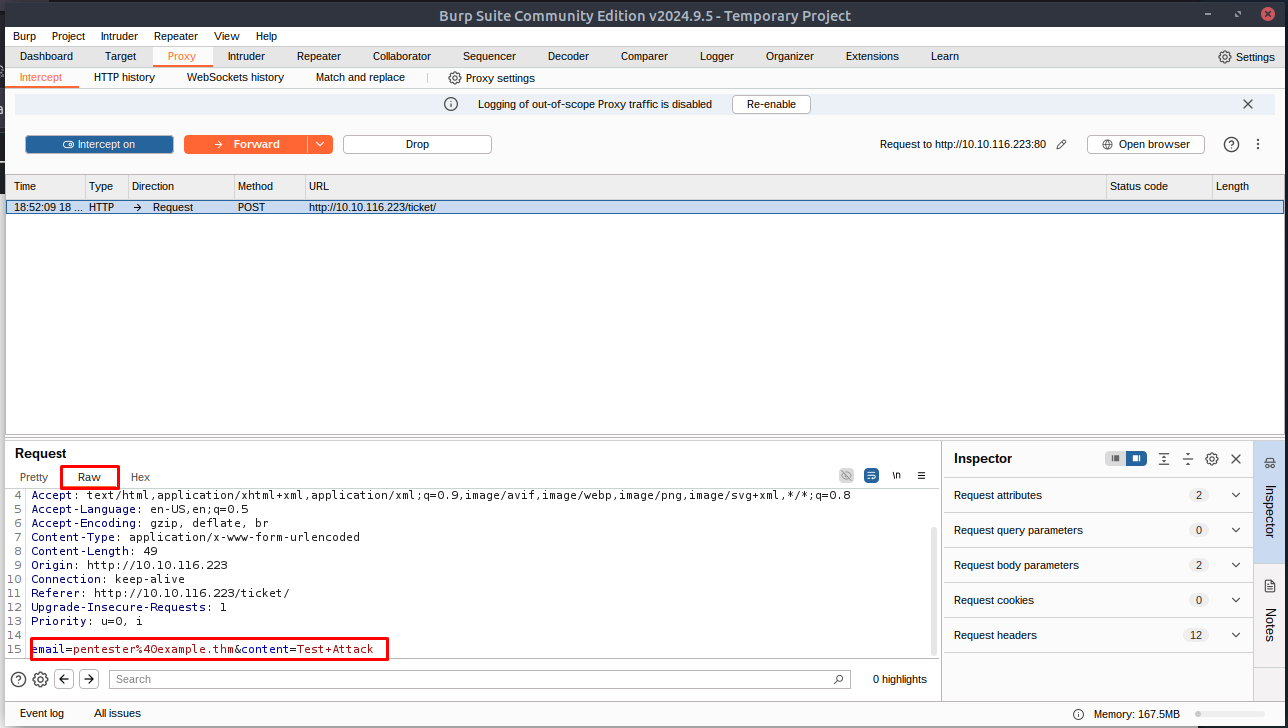
With the request captured in the proxy, we can now change the email field to be our very simple payload from above: <script>alert("Succ3ssful XSS")</script>. After pasting in the payload, we need to select it, then URL encode it with the Ctrl + U shortcut to make it safe to send.